Background
I recently landed a new job 🥳 which, as expected in the tech industry, came with a brand-new MacBook.
The first task on my to-do list for this new job was to set up my MacBook in a way that would allow me to efficiently write code and tackle everyday problems. Instead of transferring all of my data and tools from my old machine, I decided to take this opportunity to search for new tools. It’s been an enjoyable process thus far, and it’s also been a great moment to verify whether the tools I’m used to are still the best ones for the current moment.
I understand that each developer has different habits and faces unique challenges, and therefore this setup may only be the best option for me. However, I hope that someone out there can find this article helpful, even if only a part of it.
Setup Mac for web development - macOS
Dock
After getting my new MacBook set up with the necessary hardware and software updates, I dove into the task of customizing my dock for optimal efficiency.
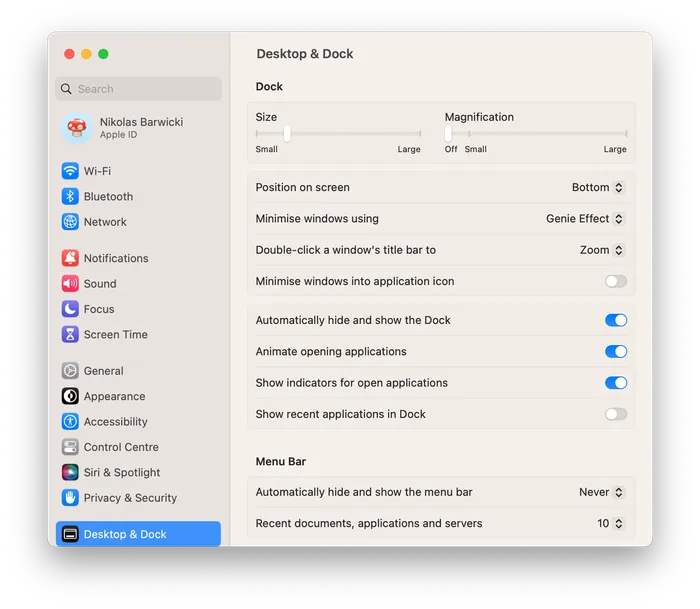
The first thing I did was remove all unnecessary apps from the dock, ensuring that only the most frequently used applications were present.
Next, I changed the size of the dock and turned off the magnification feature, as I find it most useful when the dock automatically hides and doesn’t show recent applications. This helps me focus on my work without unnecessary distractions and clutter.
Customizing the dock may seem like a small task, but it can make a significant impact on your productivity. With a streamlined and organized dock, you can quickly access the tools you need to write code and solve problems efficiently.
I encourage all developers to take a few minutes to personalize their workspace and find what works best for them.
Keyboard
In the world of programming, working with text is a crucial part of the job.
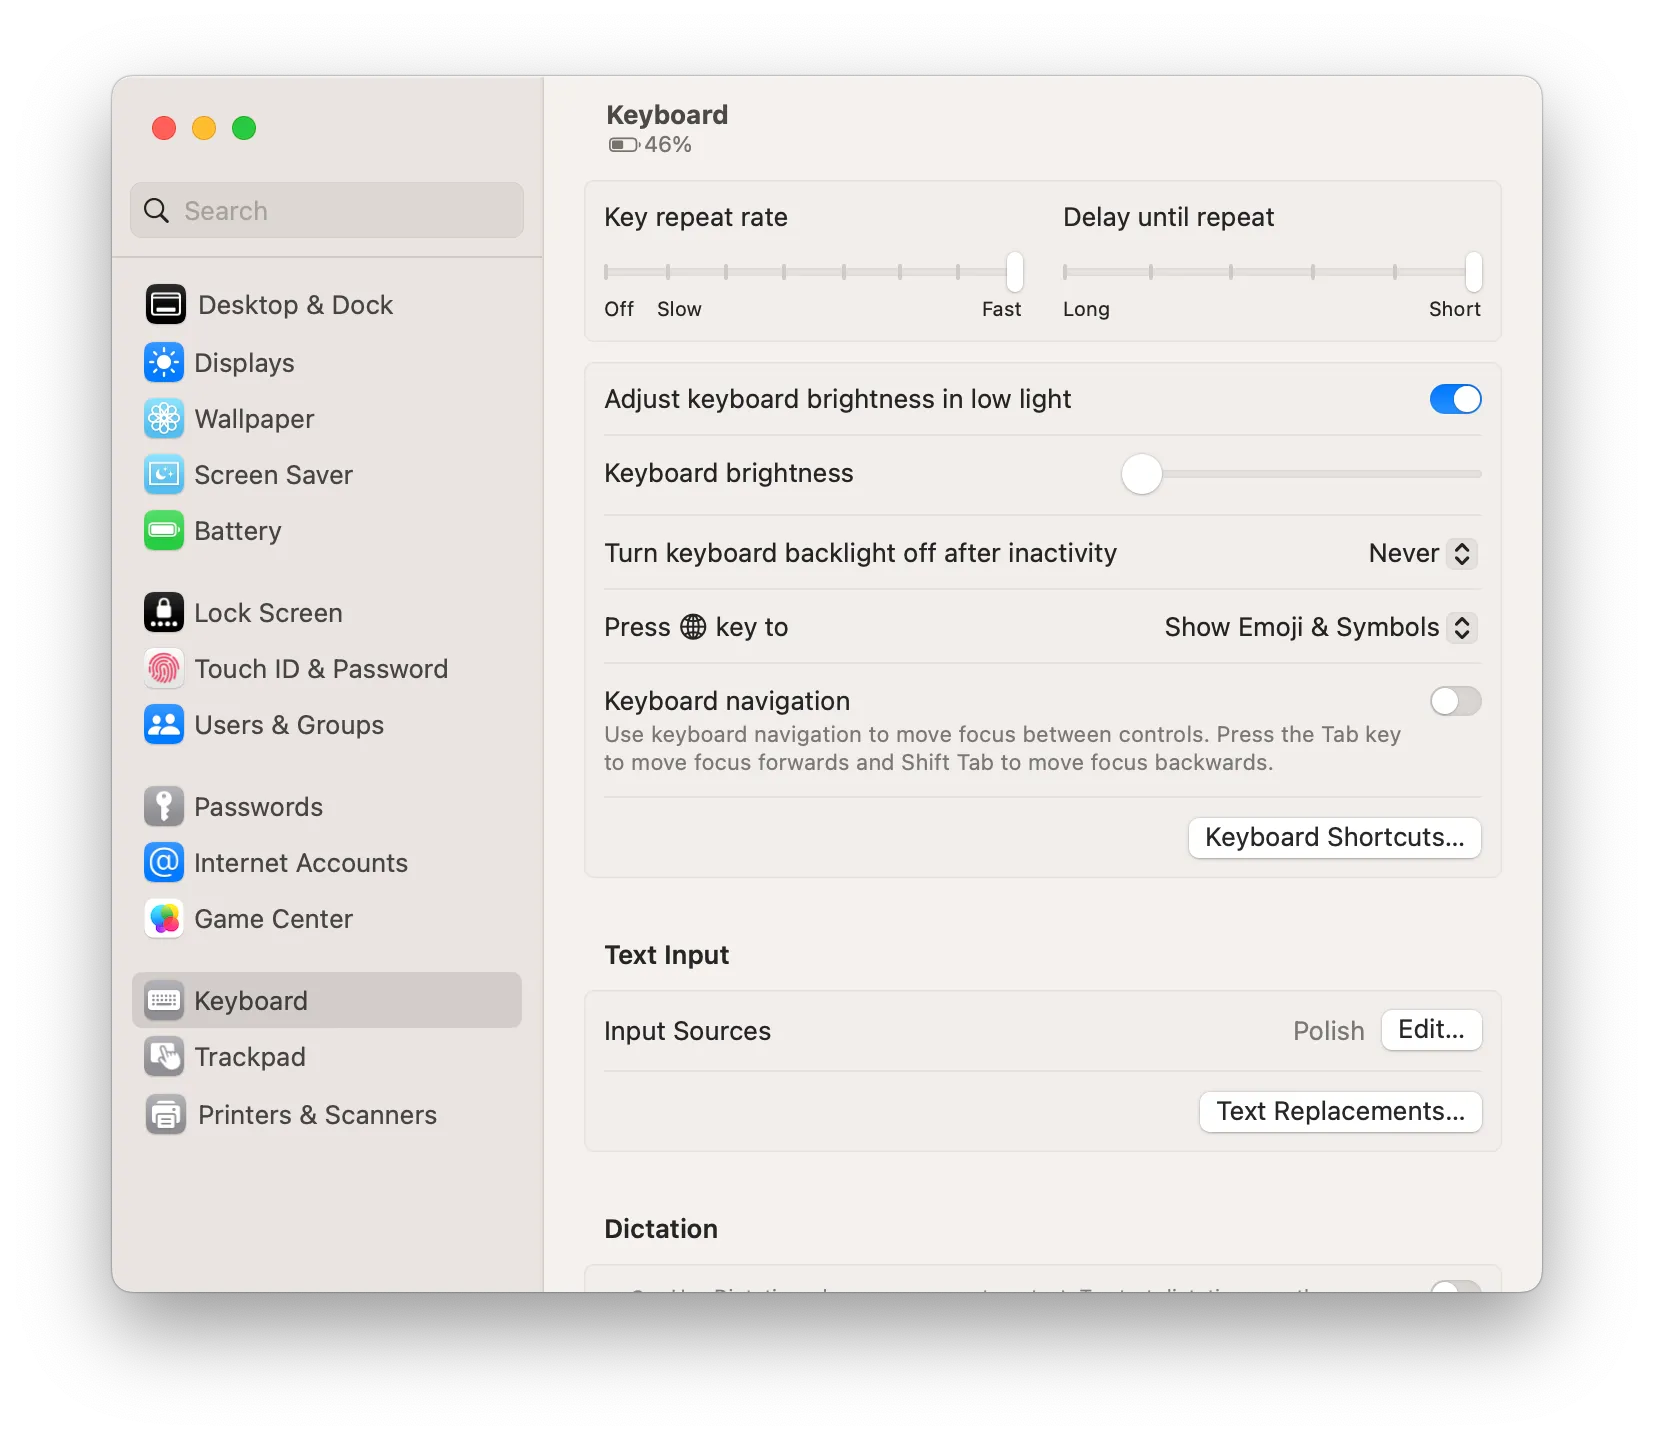
When it comes to the keyboard, there are two things I do to optimize my workflow. Firstly, I set the key repeat rate to the fastest setting and minimize the delay until repeat, ensuring that my typing speed is not hindered by a slow repeat rate.
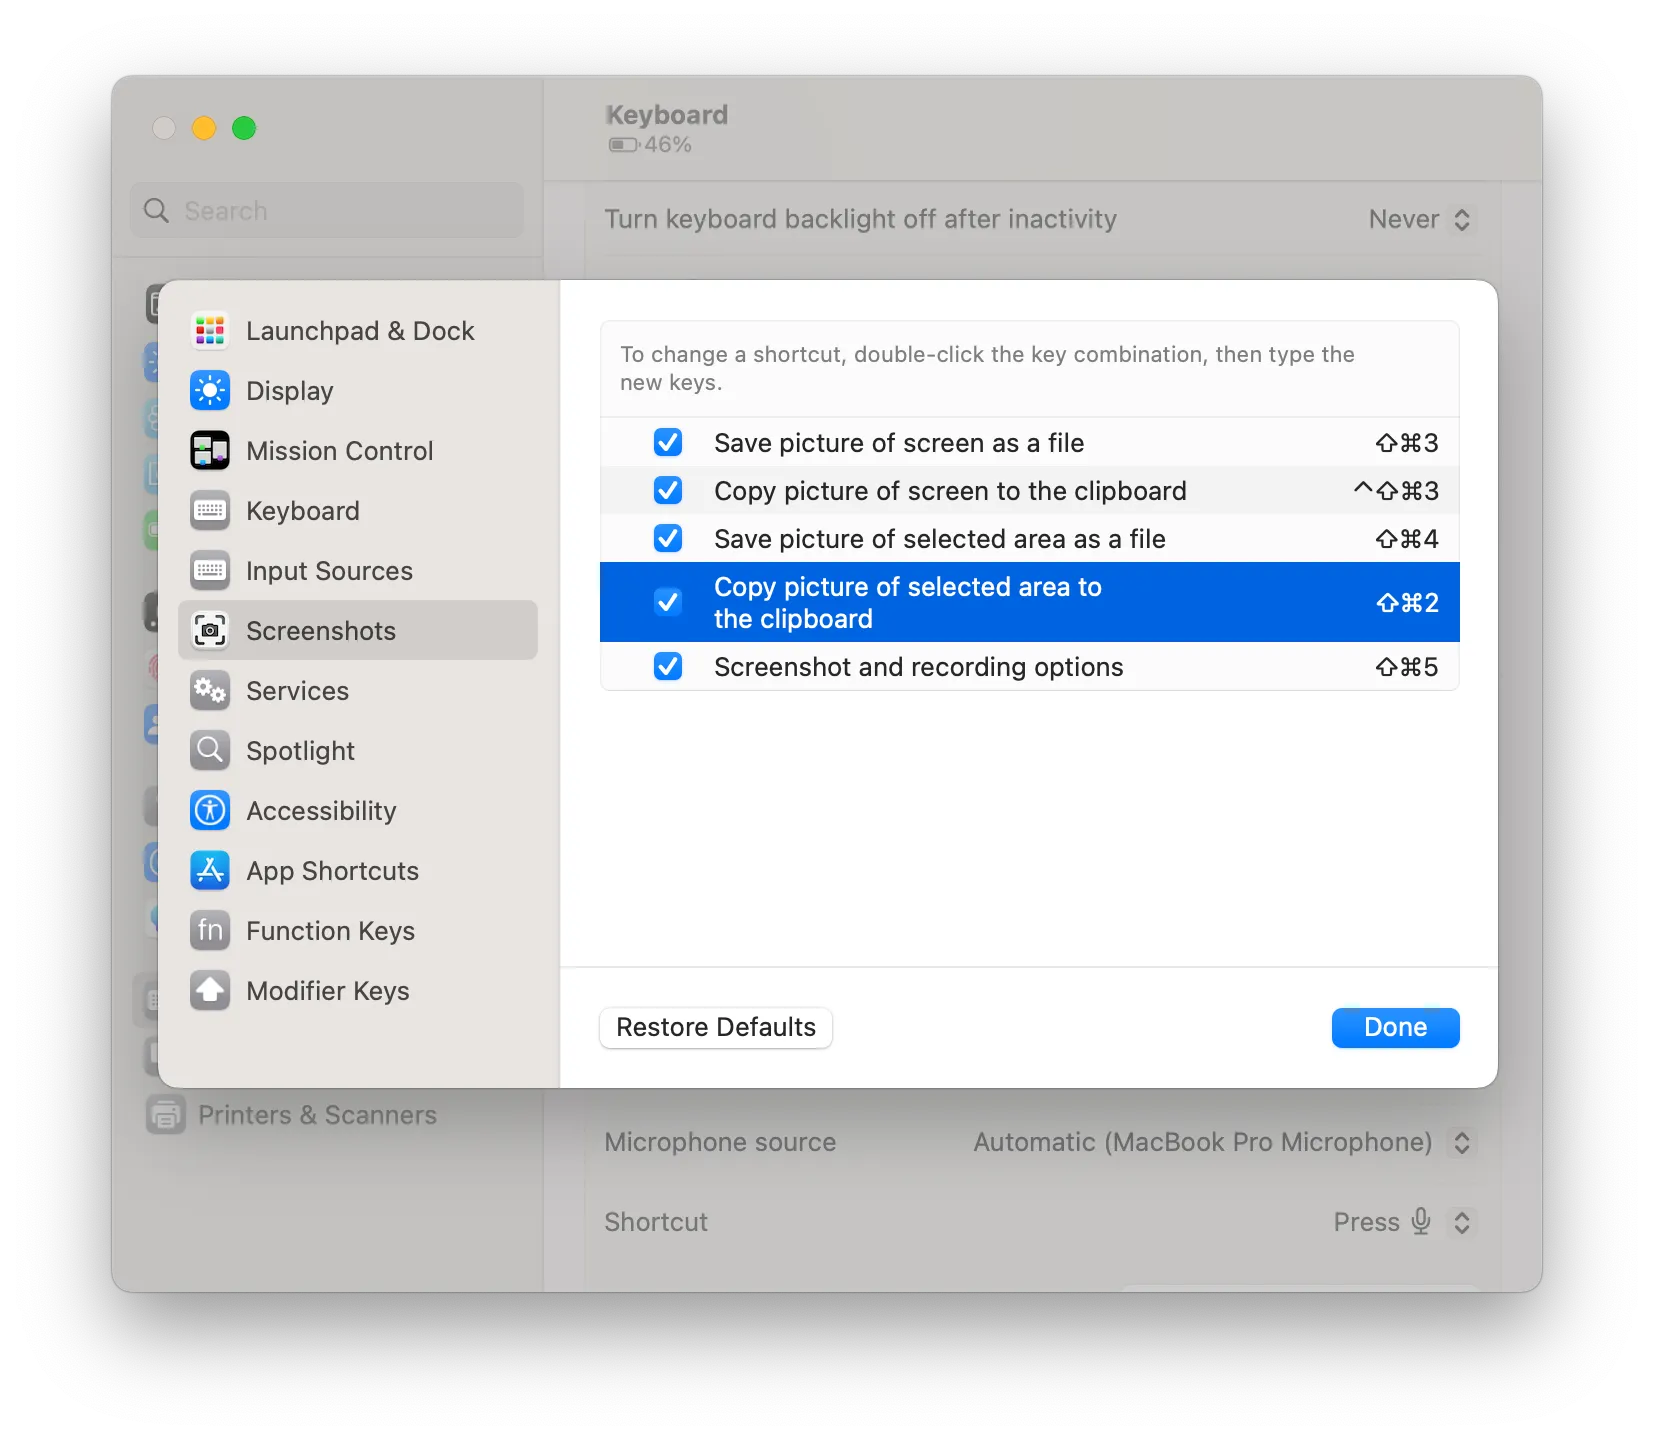
Secondly, I discovered a game-changing shortcut that has made my life so much easier. As someone who takes a lot of screenshots, my desktop used to be cluttered with them. However, most of the time, I didn’t need to keep these screenshots because I either sent them to someone else or pasted them into another app. Fortunately, MacOS allows you to save recent screenshots directly to your clipboard without cluttering up your desktop or any other directory.
To make use of this feature, I added a shortcut that works wonders for me - Shift + Command + 2. This shortcut saves me time and effort, allowing me to take and use screenshots without any unnecessary hassle.
Trackpad
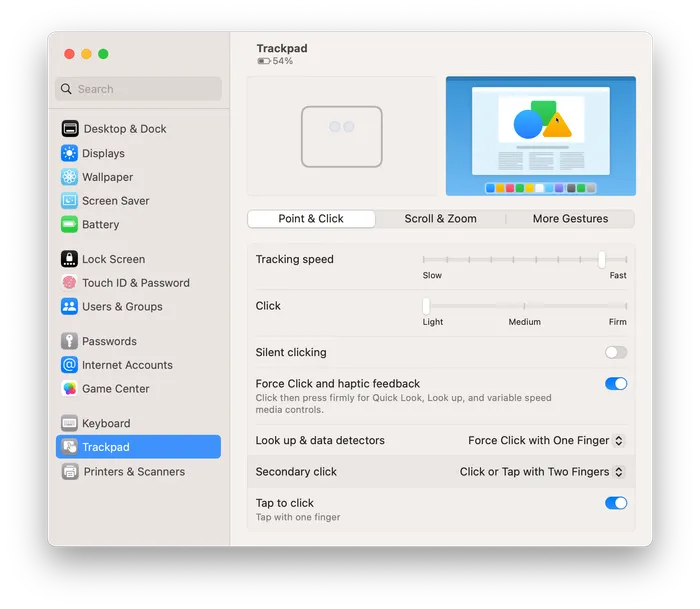
I prefer my trackpad to have a similar feel and responsiveness to my keyboard. That’s why I always set the tracking speed to almost the fastest possible setting and enable the Tap to click option.
To any fellow developers out there, I highly recommend taking the time to learn and utilize the most commonly used trackpad gestures. By familiarizing yourself with these gestures, you can significantly improve your productivity and efficiency when working on your projects.
System preferences
You can set these from the terminal:
# show hidden files
defaults write com.apple.finder AppleShowAllFiles YES

# show path bar
defaults write com.apple.finder ShowPathbar -bool true

# show status bar
defaults write com.apple.finder ShowStatusBar -bool true

killall Finder;
Development setup
Git
Update your git settings:
git config --global user.name "John Doe"
git config --global user.email "you@domain.com"
and change globally default branch name from master to main:
git config --global init.defaultBranch mainHomebrew
Install Homebrew as your package manager:
# Paste into your terminal and follow the instructions
/bin/bash -c "$(curl -fsSL https://raw.githubusercontent.com/Homebrew/install/HEAD/install.sh)"
While being in the terminal and having Homebrew installed add those tools:
brew install \\
  nvm \\ - Node version manager
  pnpm \\ - Node package manager
  gh \\ - Github CLI
  wget \\ - cURL alternative
Last step here is to install Oh My Zsh which helps you manage your Zsh configuation
sh -c "$(wget https://raw.githubusercontent.com/ohmyzsh/ohmyzsh/master/tools/install.sh -O -)"Here is my plugins list for zsh:
plugins=(
  git
  macos
  zsh-autosuggestions
  zsh-syntax-highlighting
)
SSH key setup
I use Github only so I followed this instruction from the GitHub Docs.
Productivity improvements
As a developer, there are countless tools and extensions that can be incredibly useful for optimizing your workflow. While I’ve tested several options, I’ve found that one tool stands out above the rest - Raycast.
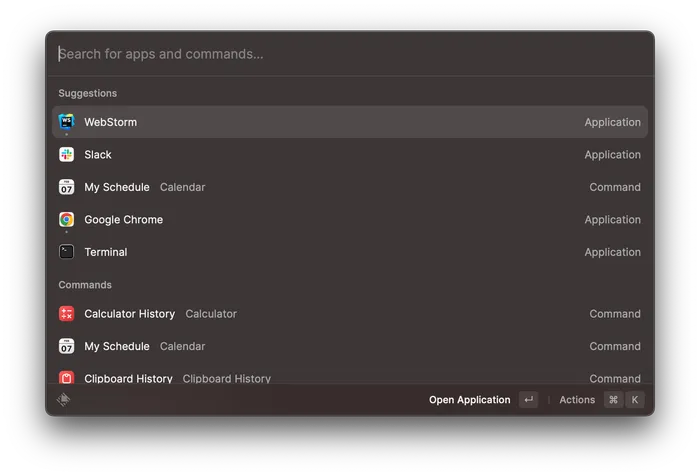
Not only is Raycast an excellent tool in its own right, but it also boasts an impressive library of extensions that can help streamline your everyday tasks. These extensions are created by both the Raycast team and the community, meaning there’s a good chance you’ll find an extension for whatever app you use on a daily basis.
To get started with Raycast, simply head to their website and download the tool. Once installed, complete the tutorial and replace MacOS Spotlight with Raycast using the Command + Space shortcut. From there, you can start exploring the various extensions and finding ones that work best for you.
As for my personal favorites, I highly recommend the following extensions:
- TickTick, which serves as my go-to to-do app for both personal and work-related tasks.
- Github, which makes it easy to navigate and access my repositories.
- Jira, which allows me to quickly access and manage my project tasks.
- Spotify Player, which enables me to like and interact with my current Spotify song without ever leaving my IDE or using my mouse.
In conclusion, Raycast and its extensions are incredibly powerful tools that can significantly improve your productivity and workflow as a developer. With a little bit of exploration and experimentation, you’re sure to find extensions that work best for you and your unique needs.
Arc Browser: A new addition to your browsing experience
Arc browser, developed by the startup The Browser Company, is a recent addition to the web browsing world. Designed to revolutionize the way we use browsers and the internet, Arc aims to transform the way we think about navigating the vast online landscape.

Unlike traditional browsers that solely focus on displaying web content, Arc positions itself as the web’s operating system, offering a range of tools to control apps and content. By treating the web as a set of remixable components, Arc allows users to customize and create their own experiences by blending tabs and bookmarks seamlessly into app launchers and providing platform-wide apps.
As an organizer’s paradise, the Arc browser introduces the concept of “Spaces”, which enable users to effortlessly switch between different workflows - each with distinct sets of pins, tabs, and user accounts. Though it is still in beta and has some limitations, the Arc browser offers a powerful vision for browsers’ future, allowing us to reimagine how we interact with the web itself.
Give Arc browser a try to unleash its potential as an indispensable tool for web developers or simply as a browser that elevates your everyday browsing experience. With its continuous improvements and innovative features, Arc could soon become your go-to browser for your web needs.
IDE
Switching from Visual Studio Code to Webstorm by Jetbrains over a year ago made my workflow more efficient. Unlike with VS Code where I had to search and install plugins individually and set them up, Webstorm was ready to use straight away with minimal customization needed.
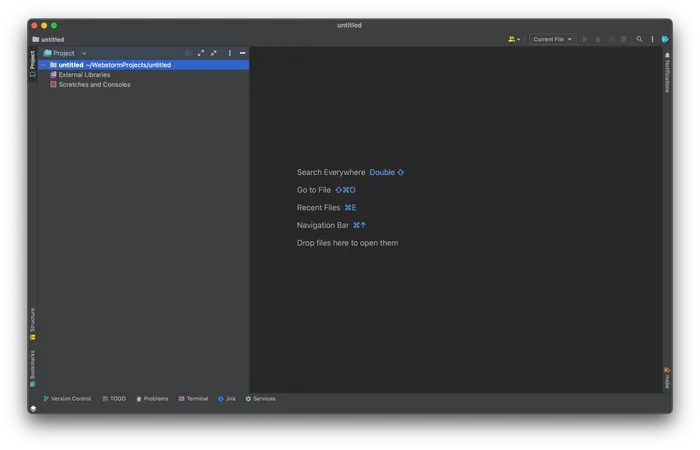
After logging into my Github account, I could easily manage remote repositories.
Despite knowing that Webstorm has numerous features, I only use a fraction of them. To make the most of the IDE, I printed out all keyboard shortcuts and tried to use them as much as possible to minimize my dependence on the mouse or trackpad.
JetBrains Toolbox
One essential tool to complement your Webstorm IDE is the JetBrains Toolbox. This handy application allows you to manage all of your JetBrains IDEs with ease.
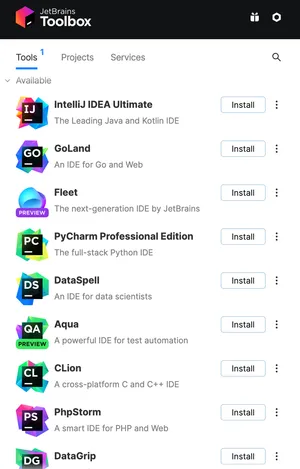
With JetBrains Toolbox, you can effortlessly install, update, and switch between multiple versions of your favorite IDEs, like Webstorm or IntelliJ IDEA. The Toolbox App also keeps you informed about the latest features, bug fixes, and updates, allowing you to decide whether to upgrade your IDE or not.
In addition to managing your IDEs, JetBrains Toolbox provides seamless integration with your team tools such as JetBrains Space and GitHub, GitLab, or Bitbucket repositories. By installing the browser extension for Google Chrome or Firefox, you can directly clone and open repositories from your browser without any hassle.
All in all, JetBrains Toolbox is an excellent addition to your web development setup, which ensures your JetBrains IDEs are up-to-date and helps you access your projects and repositories with just a few clicks. Don’t forget to give it a try!
Summary
Each of the paragraphs above can be expanded into its own article. However, I have provided a brief overview of my setup so that others can try out some of these methods on their own systems.
Feel free to leave comments and share what has worked for you and why!